Homemade Pizza Memories

Homemade Pizza Memories

Homemade Pizza Memories

Pizza Creations Created Memories

Bread making was Lorna Grieb Erickson favorite thing to do. She loved family get-togethers and over a period of years, created a wonderful recipe for homemade pizza that greatly pleased her family. Everyone looked forward to the pizza night as a special occasion. Lorna prepared the dough; then each family member could customize the pizza with toppings of their choice.

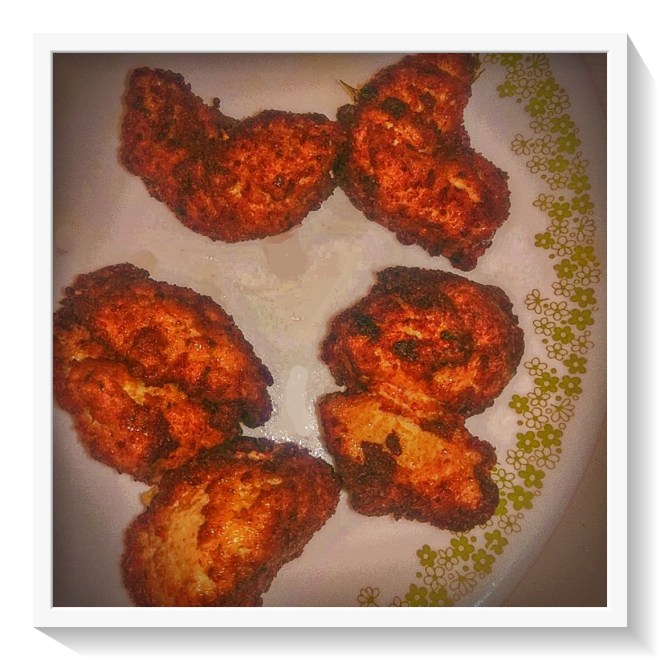
Everyone was all smiles as they put the pizza creations in the oven to bake.

The aroma was irresistible, with the family huddled around the oven in anticipation of the tasty bread and delicious cheesy/meaty toppings. All enjoyed the hands-on experience making their customized pizzas, and were all satisfied with the results.

Everything tasted better because all participated in making the pizzas together. Love and harmony in a warm kitchen.

It is a wonderful thing that this tradition is still being passed down from Lorna’s children to grandchildren and now to great-grandchildren.

Recipe for Grandma Lorna’s Homemade Pizza

Ingredients:

1 cup hot water

1 cup milk or 1 C cold water mixed with 1/3 C dry milk

1 tablespoon salt

1/3 Cup shortening

1 pkg. active dry yeast

½ cup sugar

6-7 cups all purpose flour

Home Made Pizza Instructions

In a mixer bowl mix together hot water, milk or water and dry milk, salt and sugar. Add shortening and yeast. Add 4 level cups of flour and mix on low.

Beat until smooth and elastic. Add 2 to 2 ½ cups more flour with mixer still on low speed. Dough should be soft and pliable but not sticky.

Cover and let dough raise for 15 minutes to ½ hour.

Grease 3 pizza pans. Divide dough into 3 parts and press into the pans forming a thin crust. Cover with small amount of desired pizza sauce and sprinkle with dry ground oregano. Cover sauce with grated Colby jack cheese. Add additional toppings as desired.

Preheat over to 375 degrees and bake pizzas for 15-20 minutes or until desired doneness.

We Wish You A Merry Christmas

We Wish You A Merry Christmas

Merry Christmas 2022

Cattle ranching this year has been an adventure. Since we have received no rain until recently, most of our cattle were sent to Oregon.  Yet, we did enjoy a wonderful, happy, healthy year with hours spent checking the cattle water (for the remaining cattle). Off the ranch we spent time going to church, the park and other local outings. We also have a new dog named Ruby.

Mom (Barbara Grieb) helps us keep everything in perspective and remind us to, “Trust in the Lord with all your heart and lean not on your own understanding.  In all your ways acknowledge Him and He will direct your paths.” Proverbs 3:5-6

Being blessed with an abundance of persimmons this year we blessed others and wished them a Merry Christmas with goodies baked from our family recipes for Persimmon Cookies and Persimmon bread.  Christmas blessings to you from the Grieb Ranch. 

If you are ever in the area please stop by.

And a Happy New Year!

Save the Date-Carl’s 95th Birthday July 22, 2023

Caramel Glazed Pear Cake

Every Fall Barbara Grieb would make this cake for Doctors, Mailmen, and others who so kindly served the Grieb family throughout the year. This Caramel Glazed Pear cake recipe came from the Telegram Tribune. The cake is made with oil rather than butter, but there is butter in the glaze. This yummy cake is chock-full of diced pears and roasted pecans for the quintessential fall dessert.

Instructions for Caramel Glazed Pear Cake

Caramel Glazed Pear Cake

  • 4 ripe Bartlett pears, peeled and diced (about 3 cups) sprinkle with 1 TBS sugar – set aside

Beat together with mixer

  • 3 large eggs
  • 2 cups sugar
  • 1 ¼ cups vegetable oil

Sift Together

  • 3 cups flour
  • 1 tsp salt
  • 1 tsp baking soda

In a large mixing bowl, add liquid ingredients to dry Ingredients – MIX

Fold into cake mixture (with heavy wooden spoon) diced pears and 1 ½ cups coarsely chopped roasted pecans.

Bake

70 minutes at 350 degrees in a greased and floured 10 inch Bundt Pan or Angel Food Cake Pan

OR small pan with half the recipe and then bake 35 mins an hour.

When done remove from pan and poke with fork tines

Prep time 10 mins Cook time 70 mins Total time 1 hour 20 mins

Caramel Glaze DRIZZLE Prep

  • 1/2 cup brown sugar
  • 3 Tbls butter
  • 1/8 cup evaporated milk or cream
  • 1 tsp vanilla

Stir together brown sugar, butter, and evaporated milk in a small saucepan over medium heat; bring to a boil, and cook, stirring constantly, 2½ minutes or until sugar dissolves.

Pour the warm caramel glaze over the cake allowing it to drip down the sides.

Enjoy!

Lemon Delight – a Dessert for the Generations

The three Grieb girls, Wynetta, Margie and Connie have many memories enjoying this favorite lemon delight dessert. Now Grandma Great is passing the delight onto the youngest generation. Cooking in the kitchen with Grandma Great is even more fun when dessert is whipped up.

Lemon Delight - a Dessert for the Generations  | The Story of Ranching at Grieb Ranch
Mr. P helps Grandma Great make Lemon Delight

Lemon Delight Dessert

Needed: 9×12 baking dish

Oven: 350 Degrees

Crust Ingredients

  • 1 ½ cups flour
  • 1 ½ sticks butter or margarine
  • 2/3 cup of finely chopped walnuts

Crust Instructions

Mix flour and butter together until cornmeal like. Add walnuts, mix and press into pan. Cook crust at 350 degrees for 15 minutes.


Middle “Cream Cheese” Layer Ingredients

  • 8 oz cream cheese
  • 1 cup granulated sugar
  • 4.5 oz of Cool Whip

Middle “Cream Cheese” Layer Instructions

Mix all ingredients together until creamy. Spread over cooled crust.


Lemon Delight Topping Ingredients

  • 2 (3 oz) packages of instant pudding
  • 3 cups milk
  • 2-3 Tbls lemon juice

Lemon Delight Topping Instructions

Add all ingredients together and beat until thick, then spread over cream cheese layer. Garnish with rest of cool whip topping.


Serve and enjoy cooled.

Mountain Oysters Cooked Two Ways

Grieb Ranch enjoys two recipes for Mountain Oysters, a cowboy delicacy, depending on the environment they find themselves cooking them. As a college student, Connie deep fried the oysters and served them to her classmates.

Mountain Oysters Cooked Two Ways | The Story of Ranching at Grieb Ranch

Mountain Oyster Deep Fried Recipe

“I deep-fried some mountain oysters as a low cost meal for my cooking class at Cal Poly.  The girls at my table at first had no idea that the oysters were bull testicles.  One said they were the best oysters she had ever eaten.  It was then that I let her know that they were not from the ocean.”

Ingredients:

  • 2 eggs
  • 1 tsp. salt (or 1 tsp SuzieQ Seasoning)
  • 2 dashes pepper
  • 1 cup Bread crumbs (I like to use Progresso Italian Style)
  • 1 lb. medium Mountain Oysters

Instructions:

Mountain Oysters Cooked Two Ways | The Story of Ranching at Grieb Ranch
  • Pre-heat fat for frying oysters. 
  • Clean oysters (remove outer membranes) and cut into large Walnut-sized pieces.  
  • Dip in beaten egg and seasoning. 
  • Roll in bread crumbs. 
  • Submerge in hot fat. Fry at 350 degrees until golden brown – about 3 minutes.

Mountain Oysters Grilled in an Electric Skillet

“Sometimes we had to improvise a way of cooking the oysters when out during branding on 166. We had no skillet, but did have electricity so used an electric branding iron to grill the breaded oysters.”

They are considered to be quite a delicacy.  Like other organ meats, testicles may be cooked in a variety of ways – deep-fried whole, cut into broad thin slices, or marinated.  At roundups in the old West, cowboys and ranch hands tossed the meat on a hot iron stove.  When the calf fries exploded, they were done!”

Directions for Cooking on an Electric Grill or Branding Iron

At the branding have a electric skillet going.

Cover the skillet with olive oil.  Remove outer membranes of the mountain oyster, roll in pre-seasoned bread crumbs and grill.  Serve to the Cowboys as done.     

Fast and Fresh Applesauce Recipe

Grandma Gertrude Grieb was way past her cooking years when the microwave zapped into the kitchen scene.  Upon retiring from kitchen duties, she had two stoves in her kitchen: A wood stove she used daily and an new electric stove right next to it. She only used the electric stove occasionally. Grandma would cook the apples in her wood stove when making applesauce.

Apple peeler, corer and slicer

Although we are thankful our time-saving microwave, we still manually peel, core and slice the apples when using this applesauce recipe. The counter-top-mounted apple peeler/corer/slicer has added a lot of fun to the apple peeling, coring and slicing process.  Kids of all ages like to see who can make the LONGEST snake to eat out of the apple peel.

Apple peel skins

Microwave Applesauce: Fast and Fresh Applesauce

From the Kitchen of: Connie Grieb Willems                  

Servings: 5

Ingredients:

  • 8 apples (peeled, sliced, cored)  – Gravensteins or Braeburn are my favorite to use).
  • 1/4 cup water or apple juice(used the juice we made)
  • 3 Tbsp Brown Sugar
  • 1/4 tsp. cinnamon1 pinch nutmeg

Instructions:

  1. Peel and core the apples (we use The Pampered Chef apple peeler/corer/slicer)*.
  2. Place all ingredients in large microwave safe bowl. Stir to combine.
  3. Cover with plastic wrap. Put one slit to vent the mixture. Microwave at High until apples are tender, about 7 to 10 minutes.
  4. Mash apples to desired consistency. Uncover and cook 5 more minutes.  Serve warm or chilled.

Variation:  Add 3 Tablespoons red cinnamon candies to applesauce.  Microwave at 5 minutes.  Stir until candies are dissolved.      


The nice thing about making your own applesauce is that you can freeze it or can it to enjoy months later. However, we usually eat each batch so fast there is nothing left for later.

Enjoying the fruit of their labor and time with Grandma.

* Just so you know, clicking the link above takes you right to the product on the Amazon site. We do get a little kick-back from any purchases made through that link, yet your price stays the same.

The Heart of the Matter…

The Heart of the Matter…  | The Story of Ranching at Grieb Ranch

Part of processing our grass fed beef means we have to deal with the organs. One of our favorite organs to consume is the beef heart. Organ meats, also known as Offal, are the liver, kidneys and heart. These are nutrient-rich food sources and can actually be delicious. Crock Pot Beef Heart is one of our favorite ways to enjoy beef heart.

On the Grieb Ranch we have three favorite ways to prepare the beef heart: Baked, fried and in the crock pot.

Crock Pot Beef Heart

Beef heart is easily enjoyed at our traditional first Sunday of the month family potluck.  The crock pot recipe is perfect for this as the heart is cooked and ready to serve as we arrive home from church.

Prepping the heart by cutting up the raw heart meat with an electric knife, may be the hardest part. Trim off the fat, and the gristle and sinew on the interior side. A 4 lb heart should be trimmed it down to about 2lbs, so just the lean meat is left. The rest is easy!


Special Memories: While looking up the family beef heart recipe Connie came across a beef kidney recipe. This brought back a clear memory: “When I was little my mother tried to prepare kidney just once.  When you walked into the house it stunk so bad that there was no way we would eat the kidney.  So, if you know a secret to preparing kidney, please let me know!”


The Heart of the Matter…  | The Story of Ranching at Grieb Ranch

Recipe for: Crock Pot Beef Heart

From the Kitchen of: Connie Grieb Willems

Servings: 8

Ingredients

  • 1 raw beef heart (trimmed down from 4 lbs to about 2 lbs)
  • 1 teaspoon “Susie Q’s Santa Maria Style Seasoning (Parsley, salt, pepper and garlic blend)
  • 1/2 teaspoon dried oregano (roll to release the flavor)
  • ½ onion

Instructions:

  1. Cut well-chilled raw heart meat horizontally into one inch slices and then cut each slice into 6 to 8 pieces.
  2. Put seasonings into the bottom of crock pot and then add the heart pieces. Stir to coat the meat.
  3. Pour in ¾ cup of water.
  4. Top with thin rings of onions.
  5. Cook on low for 5 hours.

Have You Ever Been Kissed By A Cow Tongue?

Have you ever been kissed by a cow? If so, you know cow tongues are big, strong and bumpy. That licker is one big muscle which makes cow tongue an ideal cut of meat to enjoy.

Say What? Enjoy Cow Tongue??

Say what? Our western palates many not easily wrap around the idea of eating a cow tongue but those who venture forth choose to again and again.

Have You Ever Been Kissed By A Cow Tongue?  | The Story of Ranching at Grieb Ranch
Cow tongue is delicious and nutritious.

First of all, the outer bumpy part is pulled off after cooking so one doesn’t actually consume that part. Next, because the tongue is a muscle, and a fatty one at that, it is really quite delicious and nutritious. Tongue is packed with Iron, Zinc, Choline and Vitamin B-12. It is also a complete protein providing all the essential amino acids essential for new tissue growth.

Special Memories: Connie shares her memories, “Each time we would have a beef butchered (later known as processed) we would of course have the tongue, heart and liver processed too.”

Now How do you Cook That Licker?

Recipe for: Boiled Tongue

From the Kitchen of: Connie Grieb Willems                   Servings: 6 to 8

Ingredients:

  • 1 3 lb. Tongue
  • 2 tsp. Salt
  • 3 Bay Leaves
  • 3 whole black Peppers
  • 1 Onion, sliced
  • 1 Carrot
  • 1 Stalk Celery

Instructions:

Have You Ever Been Kissed By A Cow Tongue?  | The Story of Ranching at Grieb Ranch
Wash Tongue

Wash tongue. Place in 3 cups cold water; add seasonings and vegetables; Cook slowly in covered pot for about 3 hours, or for 8 hours in a crock pot on low. Cool cooked tongue. Trim excess tissue from root and peel off the outer bumpy skin layer.

Serving Suggestion: Grieb Ranch folks like to slice the tongue into thin slices and dip in mustard. Yum . . . really!

Have You Ever Been Kissed By A Cow Tongue?  | The Story of Ranching at Grieb Ranch
Sliced, cooked cow tongue dipped in mustard.

Chicken or Rabbit Enchiladas

Chickens and rabbits have been raised on the Grieb Ranch through the years.  However, it was only in 2000’s that the Grieb family changed from eating fried chicken and rabbit to enjoying chicken or rabbit enchiladas.

Recipe for: Chicken or Rabbit Enchiladas

From the Kitchens of: Sandi Ferrio and Connie Grieb Willems                         Servings: 8

Ingredients:

  • Seasoning packet – 1 teaspoon Cumin, 1 teaspoon chili powder, ½ teaspoon salt and 1 Tablespoon onion Powder
  • 2 – 2 12 lbs dressed rabbit or 2 – 2 1/2 lbs broiler- fryer chicken whole
  • Water, pepper and garlic to slow cook meat in
  • 3 Cups Cheddar cheese or your favorite cheese – grated
  • 8 to 10 flour tortillas
  • 2 small cans Green Enchilada Sauce (Mild) or one large can 28oz

Instructions:  

About two hours before you begin prepping the enchiladas prepare the chicken or rabbit meat – Place chicken or rabbit in a large crock pot and add pepper and garlic with water.  Cook on high for 2 hours until meat falls off bones. Remove and allow to cool. When cool, pull meat from the bones and shred the meat.

After meat has been cooked:
  1. Warm shredded meat in frying pan with a small amount of oil or PAM spray to help keep meat from sticking. As meat heats, sprinkle seasoning packet to taste.
  2. Heat green enchilada sauce in separate saucepan until warmed. Remove from heat.
  3. Warm 8 to 10 flour tortillas in microwave 20 to 30 seconds until warm. This softens the tortillas and makes them more pliable.
  4. Pour enough sauce in bottom of 9×13 dish to just cover it.
  5. Dip a tortilla into sauce in saucepan then lay on a plate and fill with  a few spoonfuls of meat and shredded cheese then roll up tightly.   Place in casserole dish.
  6. Repeat until pan is full. Pour remaining sauce over enchiladas.
  7. Sprinkle with remaining cheese.
  8. Bake 350 degree for 20 minutes covered.  Remove from oven and let sit for 5 min. before serving.

Dress with salsa, sour cream and olives as desired. Serve Enchiladas with a side salad, or beans and rice.

Grandma Gertrude Grieb’s Pig Head Sandwiches

Grandma Gertrude Grieb’s Pig Head Sandwiches  | The Story of Ranching at Grieb Ranch

Grieb Ranch people have always purposed to enjoy the products of their land through the generations. Cattle, pigs, chickens, and fruit trees have taken root, roamed the hillsides or pecked the garden since the Grieb Family set up Grieb Ranch.

Grandma Gertrude Grieb’s Pig Head Sandwiches  | The Story of Ranching at Grieb Ranch

A childhood memory of Carl Grieb’s is his Grandma’s Pig Head Sandwiches. Crock Pots were not a thing of the past, so Grandma Gertrude Grieb would slow-cook the pig head in the oven or a big pot. Slow cooking would soften, flavor and cook the meat so it would peel off the bone. She ground this flavorful meat to serve in sandwiches.

Grandma Gertrude Grieb’s Pig Head Sandwiches Recipe

Ingredients:

  • 1 full pig head
  • tsp Garlic salt
  • tsp Salt
  • tsp Pepper
  • 2 garlic clove heads
  • 1 onion
  • water

Directions:

Set pig head cut side down in a crock pot.  Rub about a teaspoon of garlic salt, salt, pepper mix into the skin. Around the edges of the head tuck two whole garlic clove heads, and one onion.  Add an inch of water to the bottom of the crock pot and cook on low for 8 hours or until the meat is fork-tender.  Peel meat from head and then grind meat and add seasonings to taste. Serve as meat in a sandwich.

Grandma Gertrude Grieb’s Pig Head Sandwiches  | The Story of Ranching at Grieb Ranch
Pig Head Meat